In my journey to optimize my Porsche 944 for track days, upgrading the suspension was a crucial winter project. As a key component of this upgrade, I focused on maximizing negative camber, a critical aspect of wheel alignment for performance driving. This article details my fabrication of custom Camber Car Part – specifically, camber plates – to achieve the desired negative camber for improved handling on the track.
Understanding Camber and Negative Camber Benefits
Camber, in automotive terms, refers to the angle of the car’s wheels when viewed from the front. Specifically, it’s the inward or outward tilt of the top of the tire relative to the vertical axis of the vehicle. Negative camber describes a situation where the top of the tire is tilted inwards, towards the center of the car.
Why is negative camber so important, especially for track cars like the Porsche 944? The primary benefit lies in enhanced cornering grip. When a car corners, body roll causes the outside tires to lean outwards. Introducing negative camber at static ride height means that as the car leans into a turn, the outside tire becomes more perpendicular to the road surface, maximizing the contact patch. This increased contact directly translates to greater grip and cornering force.
Furthermore, tires generate a “camber thrust force,” a phenomenon well-documented in performance tire literature, such as “The Racing Tire and High Performance Tire” by Paul Haney. This force contributes to cornering performance when negative camber is applied.
Considering my move to Toyo RRR track tires, which, according to Tire Rack specifications, perform optimally with 3 to 5 degrees of negative camber, it became clear that the stock Porsche 944 suspension’s -2 degree negative camber limit was insufficient. Even my Kumho Ecsta rain tires would likely benefit from more adjustability than the stock setup offered. Therefore, camber car part modification, specifically the installation of adjustable camber plates, was essential.
The DIY Advantage: Fabricating Camber Plates
Commercially available camber adjustment plates are readily accessible, but with prices starting around $500, I considered a DIY approach. For someone with fabrication skills, creating camber car part like camber plates is a viable and cost-effective alternative. I decided to leverage my fabrication abilities to craft a set tailored to my needs.
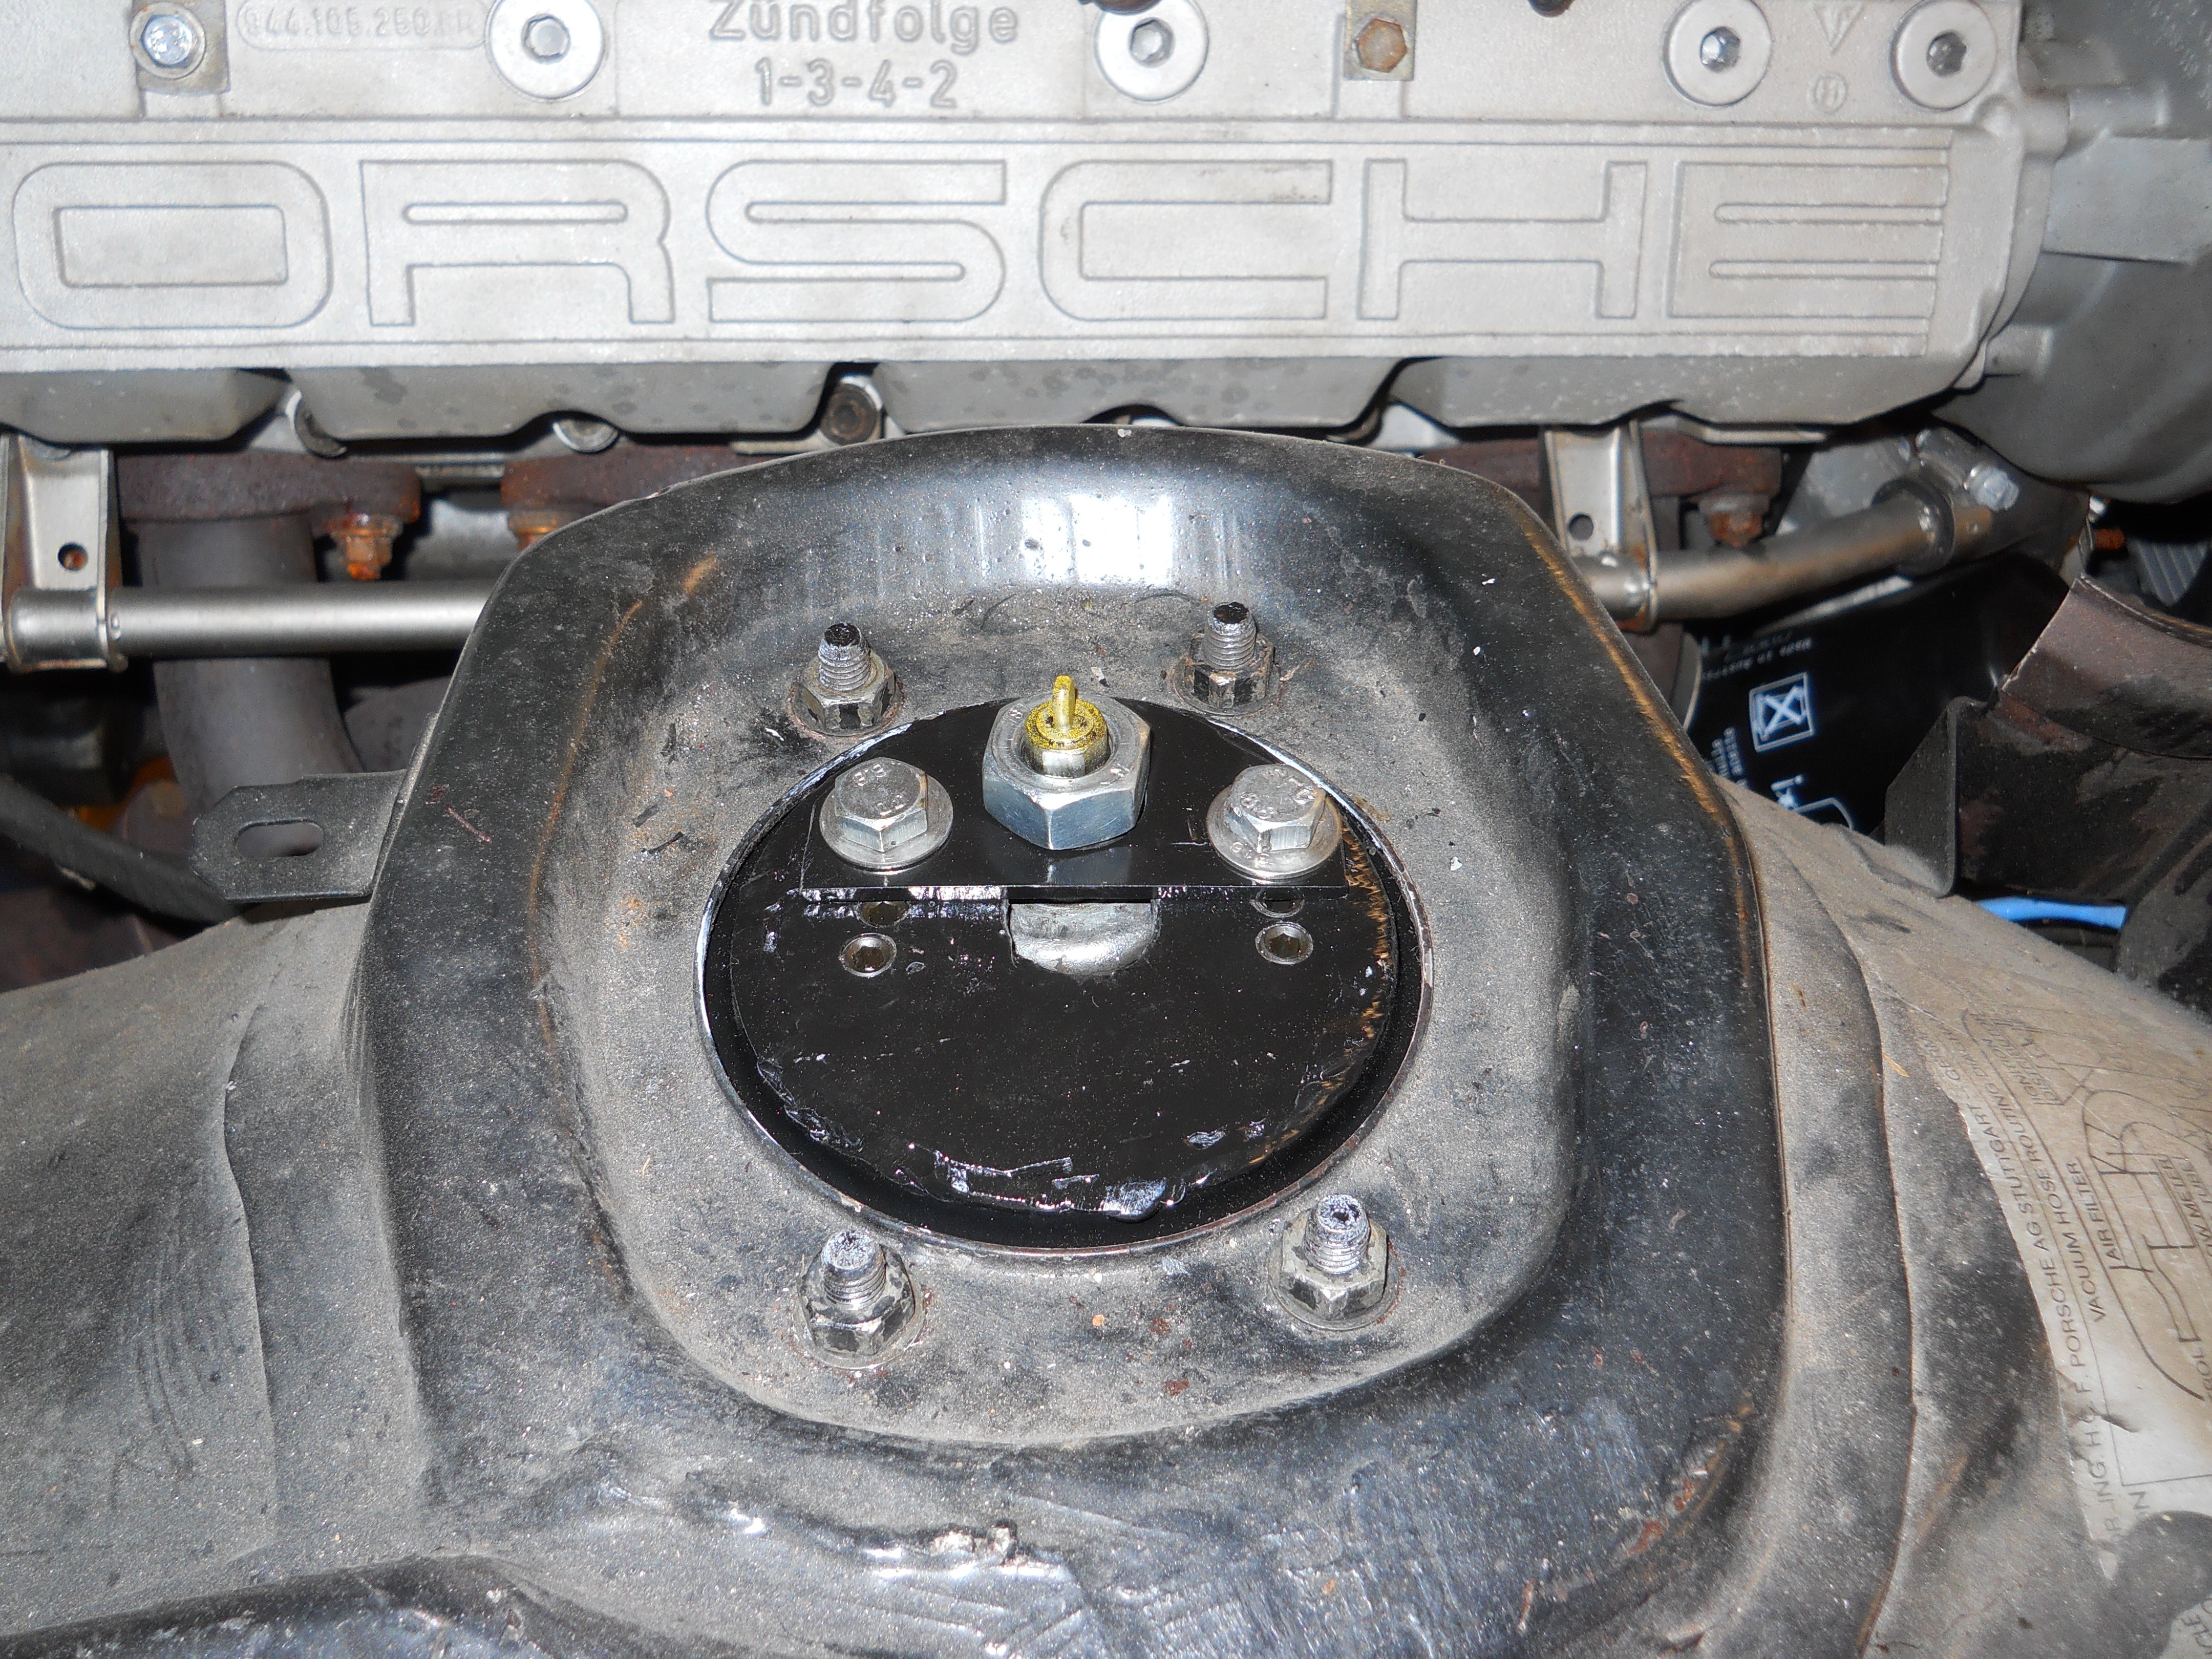
My approach began with a thorough examination of the stock Porsche 944 strut top assembly. I identified a roller thrust bearing situated at the top of the strut, encased in a rubber bushing, and mounted to a plate that bolted to the strut tower. My fabrication process involved several key steps:
-
Bearing Preparation: I started by carefully removing the rubber bushing material from the stock roller thrust bearing using a wire wheel, cleaning the bearing for reuse.
-
Mounting Plate Modification: The top section of the original mounting plate was cut off to create a base for the adjustable plate.
-
Fabricating the Adjustable Round Plate: A circular plate was cut from 1/4″ steel plate, sized to fit within the modified mounting plate. A slot, approximately 1″ long, was then cut from the center of this round plate to its edge. This slot is crucial for camber adjustment, allowing for roughly 3 degrees of additional negative camber.
-
Creating Adjustment Points: On the top surface of the round plate, I drilled and tapped three pairs of holes. These threaded holes are designed to engage with a keeper plate, allowing the strut rod to be secured in different positions, corresponding to approximately -1.5 degrees, and -3 degrees of camber adjustment beyond the stock setting.
-
Welding Guide Plates: Two guide plates were welded to the underside of the round plate. These plates serve to securely locate and guide the bearing, ensuring smooth and controlled camber adjustments.
-
Assembly and Finishing: With all components fabricated, I proceeded to MIG weld the pieces together, creating a robust camber car part. After welding, black paint was applied for corrosion protection and a clean finish. Allen head screws were inserted into the unused tapped holes, serving to prevent debris ingress and add reinforcement to the plate.
Achieving Desired Camber Settings
These DIY camber plates, when installed, offer a significant range of camber adjustment for my Porsche 944. Combined with the stock eccentric bolts on the lower strut housing (which provide up to -2 degrees of negative camber), these plates enable me to achieve a total negative camber of up to -5 degrees. This adjustability is essential for optimizing tire performance for both my track Toyo RRR tires and my Kumho Ecsta rain tires, ensuring optimal handling in diverse conditions.
By fabricating my own camber car part, I not only saved a considerable amount of money but also gained a deeper understanding of the suspension system and the intricacies of performance alignment. This DIY approach to enhancing my Porsche 944’s track capabilities proved to be a rewarding and effective project, perfectly aligning with the demands of competitive track driving.