Creating carbon fiber car parts often involves complex and expensive processes. However, with advancements in 3D printing technology, producing molds for carbon fiber parts has become more accessible and cost-effective. This guide will walk you through a simplified method of creating carbon fiber molds using 3D printing, specifically focusing on applications for car parts. This technique is ideal for enthusiasts and professionals seeking to produce custom or low-volume carbon fiber components without the need for specialized equipment or high-temperature epoxies.
Material Selection and Preparation
The foundation of a successful 3D printed mold lies in choosing the right materials. For carbon fiber mold creation, PET-G filament is highly recommended due to its inherent release properties when used with epoxy resins. Unlike ABS, PET-G offers a more reliable release, simplifying the demolding process.
After 3D printing, mold preparation is crucial. Applying a release agent is essential, even with PET-G. Polyvinyl Alcohol (PVA) release agent is particularly effective as it not only facilitates part release but also helps smooth out the layer lines inherent in 3D printing, leading to a better surface finish on the final carbon fiber part.
The molds created using this method are compatible with various conventional resin systems, including epoxy, polyester, and vinylester resins. While primarily suited for hand layup processes, these molds can also be used for resin infusion, although envelope bagging might be necessary due to the potential porosity of 3D prints. It’s important to note that these molds are not designed for high-temperature curing processes typical of prepreg production, as vacuum bagging pressure can cause warping and distortion, even if the PETG’s Heat Deflection Temperature (HDT) is not theoretically exceeded.
Materials and Equipment Checklist
To embark on this project, ensure you have the following materials and equipment readily available:
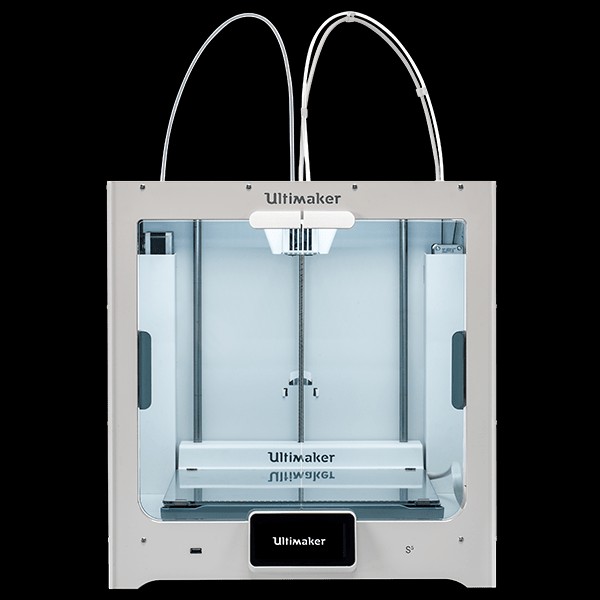
Ultimaker S5
A reliable and user-friendly 3D printer like the Ultimaker S5 is crucial for creating precise molds. Its large build volume and material compatibility make it ideal for automotive component molds.
Learn more >
Kimya PETG Filament
Opt for Kimya PETG filament for its affordability, versatility, ease of use, and excellent release properties with epoxy resins, essential for 3D printing carbon fiber car part molds.
Learn more >
Additional Materials & Equipment:
- 3D Modeling Software: For designing your car part mold.
- PVA Release Agent: For easy demolding.
- Epoxy Laminating Resin & Hardener: Such as EL2 laminating resin, suitable for hand layup.
- Carbon Fiber Fabric: Choose the weave and weight appropriate for your car part.
- Mixing Cups and Stir Sticks: For resin preparation.
- Laminating Brushes, Rollers, or Squeegees: For resin application and wet-out.
- Peel Ply (Optional): For a neat inner surface finish.
- Trimming Tools: Dremel with cut-off wheel, sanding block, sandpaper (various grits).
- XCR Coating Resin (Optional): For a high-gloss cosmetic finish.
- Wet and Dry Sandpaper (400 grit and finer).
- Polishing Compound (e.g., NW1) and Polishing Machine (Optional).
- Microfiber Cloths.
- Safety Gloves and Respirator: For safe resin handling.
Step-by-Step Process: Creating 3D Printed Molds for Carbon Fiber Car Parts
The process of creating carbon fiber car parts using 3D printed molds involves several key stages, each critical to achieving a high-quality final product.
1. Designing and 3D Printing the Mold
Begin by designing your car part mold using 3D modeling software. Incorporate flanges or extensions into your design to facilitate the layup process. When 3D printing, PET-G is the recommended material for directly printed molds due to its reliable release characteristics. Printing at a finer layer resolution will result in a smoother mold surface, which in turn eases the release of the carbon fiber part and improves its surface finish. For a balance of speed and quality, ‘standard’ CURA Slicer settings with a 0.15mm layer height are a good starting point.
Orient the part on the print bed so that the layers are printed parallel to the intended direction of part release. This orientation minimizes the mechanical interlocking effect of the print surface. However, as long as your design includes a draft angle of 5 degrees or more, successful demolding is achievable even if layer lines are perpendicular to the release direction. For larger car part molds exceeding the build volume of desktop printers, consider using large-format 3D printers or printing the mold in sections for subsequent bonding.
2. Applying the PVA Release Agent
Although PET-G exhibits inherent release properties with epoxy resins, applying a release agent remains crucial for ensuring clean separation of the carbon fiber part from the 3D printed mold. PVA release agent is highly recommended for this purpose, providing a fast and dependable release. Apply a single, even coat of PVA by wiping or brushing it onto the entire mold surface. The coating should be generous enough to cover the surface adequately but not so thick as to cause drips or runs. Allow the PVA release agent to dry completely at room temperature, typically taking around 30 minutes.
3. Carbon Fiber Lamination
Prepare your epoxy laminating resin by accurately mixing it with the hardener according to the manufacturer’s instructions. Double-mixing – pouring the mixture into a second container and mixing again – is a best practice to ensure thorough blending and prevent unmixed resin pockets.
Begin the lamination process by applying a thin layer of resin onto the mold surface. When performing a hand layup, it’s generally preferable to lay the carbon fiber fabric onto the resin-coated mold and then wet out the fabric from underneath. This technique promotes proper resin impregnation and minimizes air entrapment. For intricate mold details, use a laminating brush to carefully work the resin into the fabric. For larger, flatter areas, rollers or squeegees can expedite the wet-out process. Aim for a fiber-to-resin ratio of approximately 1:1 by weight for a typical wet layup.
For car parts with a thickness of 3mm or less, all layers can usually be laminated in a single operation. Thicker parts may require dividing the layup into multiple lamination stages to mitigate shrinkage and exothermic heat buildup. In this guide, a layer of peel ply is applied as the final layer to provide a clean, textured inner surface on the carbon fiber part, which also serves as an excellent bonding surface for subsequent assembly. Allow the laminated part to cure at ambient temperature for the duration specified by the resin manufacturer, typically ranging from 12 to 48 hours depending on the hardener speed and room temperature.
Caution: Avoid leaving mixed EL2 resin in mixing cups deeper than 5mm, as this can lead to a hazardous exothermic reaction. Pour excess resin into a tray to increase surface area for heat dissipation or move the container to a safe outdoor location.
4. Trimming and Initial Finishing
After successful demolding, trim the excess material from the carbon fiber car part to achieve a clean, defined edge. A rotary tool, such as a Dremel, equipped with a Permagrit cut-off wheel is well-suited for trimming carbon fiber. For edge refinement, use a sanding block followed by 240-grit sandpaper. At this stage, the part can be used as is if a cosmetic finish is not critical. However, for automotive applications where aesthetics are important, further surface preparation and finishing are recommended.
5. Surface Preparation for Coating
To achieve a smooth, pinhole-free cosmetic finish that masks the 3D print layer lines, coating the carbon fiber part with a resin or clear coat is necessary. Begin by preparing the surface by lightly abrading it with 400-grit wet and dry sandpaper to create a mechanical key for the coating to adhere to. Address any voids or pinholes present on the surface. For larger voids, use flash release tape to create a dam to contain the resin during filling. Use either the EL2 laminating resin or XCR coating resin to fill these imperfections. Allow the repairs to cure completely, then sand them flush with the surrounding surface using 400-grit sandpaper.
6. Coating with XCR Coating Resin
With the surface prepped and repaired, apply a coating to achieve a glossy, durable finish suitable for automotive applications. While automotive clear coats can be used, XCR coating resin is recommended for its durability and ease of brush application. Apply XCR epoxy coating resin at a rate of approximately 300 grams per square meter per coat. Mix a slightly larger batch than calculated to account for wastage. Accurately mix the hardener with the resin at a ratio of 100:35 using scales accurate to one-tenth of a gram, especially for small batches. Double-mix the resin as described in step 3. Apply a thin, even coat using a brush, avoiding overloading to prevent runs. Check for and remove any runs shortly after application. Depending on the initial coat’s finish, a second coat may be needed to fully cover surface irregularities. Apply the second coat when the first reaches the B-stage – tacky to the touch but leaving no residue (around 3 hours for XCR, but temperature-dependent). Allow the resin to fully cure for 12–24 hours post-application.
Caution: Do not leave mixed XCR resin in mixing cups deeper than 5mm to prevent exothermic reactions. Manage excess resin as described in step 3.
7. Sanding and Polishing to a Mirror Finish
While the XCR coating might provide an acceptable finish, sanding and polishing are generally preferred for a consistent, professional, mirror-like finish on carbon fiber car parts. Begin sanding with 400 or 800-grit wet and dry sandpaper to flatten the surface. Sand wet to prevent paper clogging, progressing through increasingly finer grits up to at least 1200 grit. Use a sanding block for flat and gently curved areas, and use the sandpaper alone for complex curves. Clean the part and change the water when switching to a finer grit to prevent scratches. After 1200 grit (or finer), proceed with final polishing using a compound like NW1. Use a foam pad on a polishing machine for larger parts. NW1 is a self-diminishing compound that refines the finish as you polish, allowing for a mirror polish in a single step. Wipe away residue with a microfiber cloth to reveal the finished polish.
8. The Final Carbon Fiber Car Part
By following these steps, you can successfully create high-quality carbon fiber car parts using 3D printed molds. This method opens up possibilities for custom automotive components, offering a blend of precision, cost-effectiveness, and design flexibility.
Browse 3D Printers
Discover Applications
2021 Edition
Professional 3D Printer Buyers Guide
Choosing the right 3D printer for carbon fiber car part mold creation is crucial. This guide helps you find the perfect printer based on pricing, materials, dimensional accuracy, and more.
Download Now