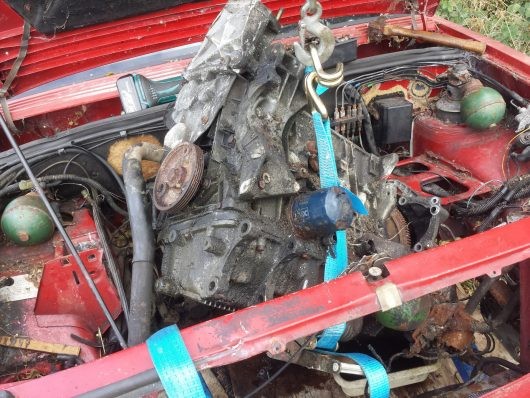
This week marks the completion of our breakfast bar project, and it’s been quite the journey using up-cycled car parts! To be honest, the idea of using scrap car parts for this project wasn’t initially planned. It sparked when I was taking apart an old Citroën BX to salvage aluminum for CNC castings (you can see more about my casting experiments here). Let me emphasize, if you’re keen on crafting cool items, the best way to learn is by dismantling things! Gaining hands-on experience with how previous designs were constructed and understanding the mechanics is incredibly insightful.
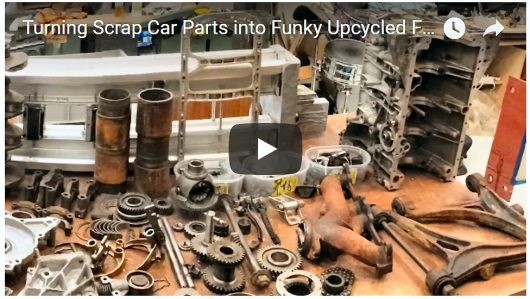
If you decide to dismantle a car, be prepared – it’s a deeply engaging, albeit greasy and oily, adventure. Below are just some of the components we rescued – and at the time of disassembly, the potential for upcycling was becoming strikingly clear! For a visual walkthrough, you can watch the video by clicking here or on the image below.
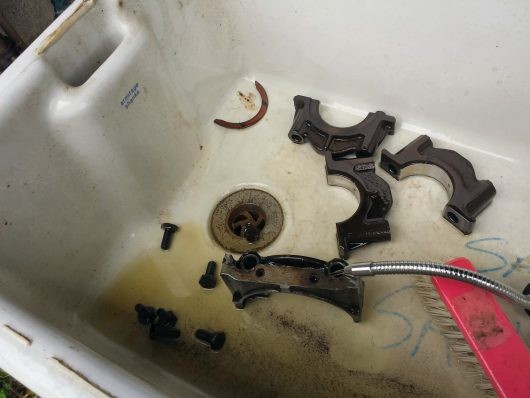
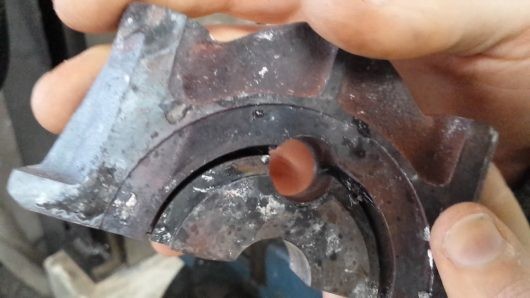
I quickly realized the necessity of a dedicated parts washer for this endeavor. Utilizing an old Belfast sink (discarded by a local university) combined with a repurposed coolant pump, I built just that. I opted for kerosene, a cost-effective and safer alternative to gasoline, favored by many motor enthusiasts. The components being cleaned in the washer are crankshaft bearing caps from the engine block. These parts will be modified to serve as robust wall mounts for our furniture.
These are some of the tools employed in the process, all of which required thorough cleaning afterward. Old engine oil and grime possess an uncanny ability to spread to every imaginable surface…
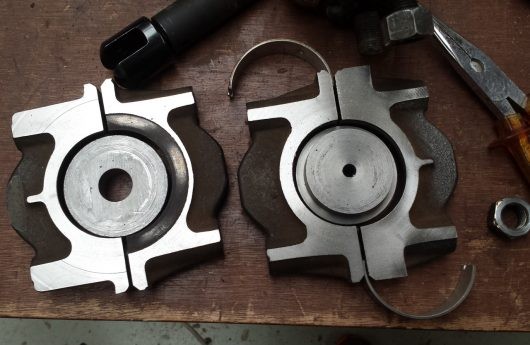
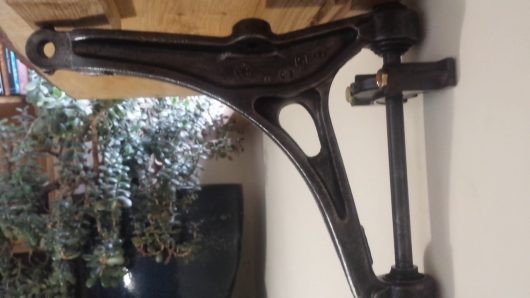
Below is one of the front suspension swing arms, commonly known as ‘wishbones,’ paired with two crankshaft mounts on either end. You can probably see where this is heading, right?
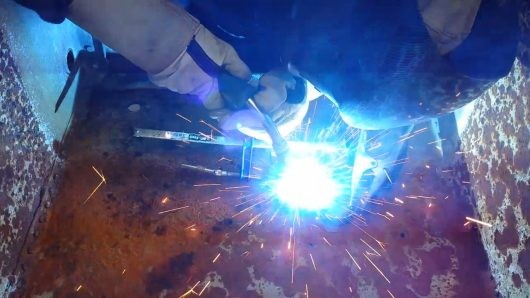
The components intended for wall mounts needed internal modifications to allow for precise drilling. This hole is crucial for securing the 16mm swing arm pin.
These mild steel pieces were then welded into place….
And after considerable effort, drilled through. To understand why they no longer have a bright metal finish, the video provides a clearer picture!
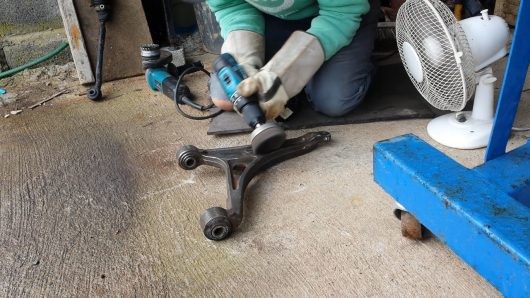
Subsequently, they were cleaned up using a large disk sander, and the focus shifted to removing rust from the wishbones. This was done using an angle grinder and a drill equipped with wire brush attachments. The drill is effective for intricate areas, while the angle grinder efficiently tackles larger surfaces. A room fan was used to disperse rust dust during this process.
Once satisfied with the level of cleanliness, a couple of coats of clear UV resistant lacquer were applied.
Utilizing the modified crankshaft mounts, the entire assembly was mounted to the wall.
And just like that, it works perfectly!
If you found this project interesting, you might also enjoy:
| Tweet |
|---|