Carbon fiber car parts are highly sought after for their exceptional strength-to-weight ratio, contributing to improved vehicle performance and aesthetics. Traditionally, manufacturing carbon fiber components has been complex and expensive, often requiring specialized tooling and processes. However, with advancements in 3D printing, creating custom carbon fiber car parts at home or in a small workshop has become increasingly accessible. This guide will walk you through a simplified process of crafting your own 3d Printed Carbon Fiber Car Parts, focusing on using readily available materials and equipment.
This tutorial will bypass the conventional method of creating patterns for molds and instead directly utilize 3D printed molds. This approach is tailored for enthusiasts and DIYers who may not have access to sophisticated equipment or high-temperature epoxies, yet still desire to create durable and visually appealing carbon fiber components for their vehicles. We’ll use Fused Filament Fabrication (FFF) 3D printing to create molds with integrated barriers, apply a release coating, and then employ a straightforward hand layup technique to form the carbon fiber part. While parts produced directly from these molds may have a surface finish influenced by the 3D print resolution and hand layup limitations, they are structurally sound and functional. For those seeking a flawless, showroom-quality finish, we will also cover applying an XCR coating resin and subsequent flatting and polishing.
Material Compatibility for 3D Printed Molds
Selecting the right 3D printing material for your mold is crucial for successful carbon fiber part fabrication. PET-G filament is highly recommended due to its inherent release properties when used with epoxy resins. Its dimensional stability and resistance to warping make it ideal for mold creation. Conversely, ABS is not recommended as a direct mold material because achieving reliable release from epoxy resin can be challenging, potentially damaging your 3D printed mold or carbon fiber part.
After the 3D printing process, proper mold preparation is essential. Applying a release agent is necessary to ensure the carbon fiber part can be cleanly removed from the mold without damage. PVA (Polyvinyl Alcohol) release agent is the most dependable choice for this method. It effectively smooths out the layer lines inherent in 3D prints while providing a robust barrier against epoxy resin adhesion. This dual action ensures both a better surface finish on the carbon fiber part and easy demolding.
The molds created using this technique are compatible with a range of common resin systems, including epoxy, polyester, and vinylester resins. These molds are particularly well-suited for hand layup processing, with or without vacuum bagging to enhance consolidation and fiber-to-resin ratio. Resin infusion is also a possibility, but due to the typical porosity of 3D prints, envelope bagging might be necessary to ensure a proper vacuum seal. It’s important to note that molds made with this process are not designed for high-temperature curing cycles, such as those used in prepreg production. Even if the Heat Deflection Temperature (HDT) of PETG is not theoretically exceeded, the pressure from vacuum bagging at elevated temperatures can lead to unacceptable warping and distortion of the 3D printed mold.
Materials & Equipment Needed
To embark on your journey of creating 3D printed carbon fiber car parts, you’ll need the following materials and equipment:
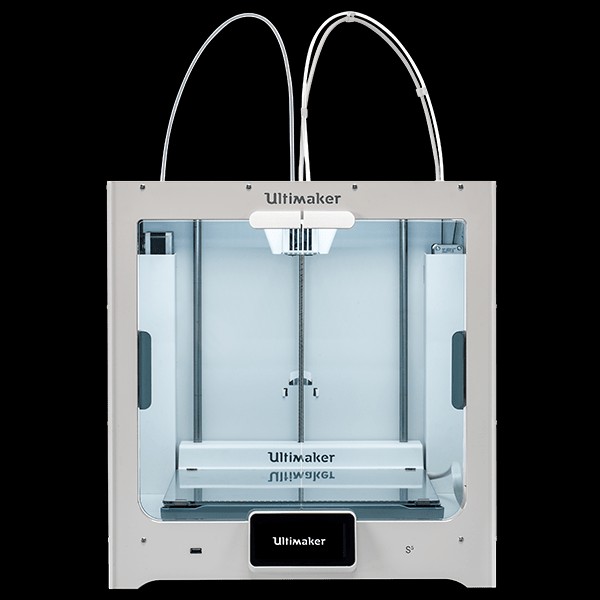
Ultimaker S5 3D Printer
A reliable and user-friendly 3D printer with a large build volume is essential for creating molds for car parts. The Ultimaker S5, known for its ease of use and extensive material compatibility, is an excellent choice for this purpose. Its precision and consistency ensure accurate mold creation, which is paramount for high-quality carbon fiber parts.
Learn more >
Kimya PETG Filament
For 3D printing the molds themselves, Kimya PETG filament is highly recommended. This material offers an excellent balance of printability, affordability, and crucially, release properties needed for epoxy resin and carbon fiber work. Its ease of use and versatility make it ideal for both beginners and experienced makers in creating molds for carbon fiber car components.
Learn more >
Additional Materials & Equipment:
- Carbon Fiber Fabric: Choose the weave and weight suitable for your car part project.
- Epoxy Resin and Hardener: EL2 laminating resin or similar epoxy system designed for hand layup.
- PVA Release Agent: For easy demolding of the carbon fiber part from the 3D printed mold.
- Mixing Cups and Stir Sticks: For accurate and thorough resin mixing.
- Brushes, Rollers, or Squeegees: For resin application and carbon fiber wet-out.
- Peel Ply Fabric: To create a textured surface on the inside of the part for bonding and a cleaner finish.
- Dremel or Rotary Tool with Cut-off Wheel: For trimming and finishing the carbon fiber part edges.
- Sandpaper (various grits from 400 to 1200): For surface preparation and achieving a smooth finish.
- Polishing Compound (e.g., NW1): For achieving a mirror-like gloss on the finished part.
- Safety Gear: Gloves, respirator, eye protection are essential when working with resins and carbon fiber.
The Process: Crafting Your Carbon Fiber Car Part
The process of creating 3D printed carbon fiber car parts involves several key steps, from designing and printing the mold to finishing the final part. Each step is crucial to achieving a high-quality, functional, and aesthetically pleasing carbon fiber component for your vehicle.
1. Create the Print: Designing and 3D Printing Your Mold
Begin by designing your mold using CAD software, incorporating any necessary flanges or extensions to facilitate the carbon fiber layup process. These features are crucial for securely clamping or holding the mold during lamination. For direct molding, PET-G is the recommended 3D printing material due to its reliable release characteristics with epoxy resins. Printing at a finer resolution will result in a smoother mold surface, which directly translates to a better surface finish on your carbon fiber car part and easier release. For this guide, we utilized standard CURA Slicer settings with a 0.15mm layer height, striking a balance between print quality and speed.
Whenever possible, orient your 3D model on the print bed so that the layer lines are parallel to the intended release direction of the carbon fiber part. This orientation minimizes the mechanical interlocking effect of the layer lines, making demolding easier. However, as long as you incorporate a draft angle of 5 degrees or greater in your mold design, successful release is achievable even when layer lines are perpendicular to the release direction.
For larger car parts requiring sizable molds, consider using large-format 3D printers like BigRep, which offer build volumes up to 1 cubic meter. Alternatively, for designs exceeding your printer’s build volume, you can print the mold in sections and subsequently bond them together using a suitable adhesive. Be mindful that PET-G’s inherent release properties might pose challenges for certain bonding agents, so choose an adhesive specifically recommended for PET-G or consider mechanical fastening methods for joining mold sections.
2. Apply the Release Agent: Preparing the Mold Surface
Even though PET-G offers a degree of inherent release with epoxy resins, applying a dedicated release agent is still essential to guarantee clean and damage-free separation of the carbon fiber part from the 3D printed mold. We strongly recommend using PVA release agent for this process due to its consistent and fast release performance. Apply PVA in a single, even coat over the entire mold surface using a wiping or brushing technique. The coating should be generous enough to ensure complete coverage but avoid applying it too thickly, which can lead to runs or drips.
Once applied, allow the PVA release agent to dry thoroughly at room temperature. Typically, this drying process takes around 30 minutes, but drying time can vary depending on ambient humidity and temperature. Ensure the PVA is completely dry before proceeding to the lamination step to prevent any issues with resin adhesion or release.
3. Laminate the Part: Carbon Fiber Layup and Resin Application
For this project, we are using EL2 laminating resin, a popular choice for hand layup carbon fiber work. Accurately and thoroughly mixing the resin with its hardener is paramount to achieving proper curing and material properties. Best practice dictates pouring the resin and hardener from their original containers into a clean mixing cup, mixing thoroughly, and then transferring the mixture to a second clean cup and mixing again. This double-mixing technique ensures no unmixed resin or hardener remains at the bottom of the first cup, leading to a homogenous mixture.
Before placing the carbon fiber fabric, apply a thin, even layer of resin to the mold surface. When performing hand lamination, it is generally advisable to lay the carbon fiber fabric onto the pre-applied resin and then saturate the fabric with resin from underneath. This technique aids in achieving thorough wet-out of the carbon fibers and minimizes air entrapment within the laminate. For intricate or small car parts, a laminating brush will be necessary to carefully work the resin into the fabric. For larger or flatter mold sections, rollers or squeegees can expedite the wetting-out process and ensure uniform resin distribution. For a typical wet layup, aim for a fiber-to-resin ratio of approximately 1:1 by weight. This means for every 100 grams of carbon fiber fabric, use approximately 100 grams of mixed resin.
For car parts with a thickness of 3mm or less, it is usually feasible to laminate all layers of carbon fiber in a single operation. However, for thicker parts, it may be necessary to divide the layup into multiple lamination stages. This staged approach helps to mitigate the effects of resin shrinkage and reduce the risk of thermal runaway, also known as exotherm, which can occur in thicker resin castings.
In this project, after the final layer of carbon fiber reinforcement is laid, a layer of peel ply fabric is applied as the outermost ply. Peel ply serves to create a textured surface on what will become the inside of the car part, providing an excellent surface for subsequent bonding operations if needed. It also helps to compact the laminate and absorb excess resin, resulting in a cleaner, more resin-rich outer surface when the peel ply is removed. With the peel ply in place, allow the part to cure at ambient temperature. Cure times will vary depending on the specific hardener used, the ambient room temperature, and the thickness of the laminate, but typically range between 12 and 48 hours.
CAUTION: Exercise caution when handling mixed EL2 resin. Do not leave mixed resin in a mixing cup if the depth exceeds 5mm. Bulk resin can undergo a thermal runaway reaction, generating significant heat and potentially posing a fire hazard. Excess resin should be poured into a shallow tray to increase the surface area and dissipate heat, or the container should be moved to a safe, outdoor location in case of overheating.
4. Trim: Refining the Part Edges
Once the carbon fiber car part has sufficiently cured and been demolded from the 3D printed mold, the next step is trimming and finishing the edges to achieve a clean and professional look. For this project, we utilized a Dremel-type rotary tool equipped with a 32mm Permagrit cut-off wheel. Permagrit wheels are exceptionally durable and effective for trimming carbon fiber, providing hours of continuous use. This tool allows for precise material removal and shaping of the carbon fiber edges.
After the initial trimming with the cut-off wheel, the edges were further refined and trued up using a sanding block and finished with 240-grit sandpaper. Sanding ensures smooth, even edges and removes any rough spots or imperfections left by the trimming process. If you are satisfied with the surface finish achieved after the XCR coating (explained in a later step), the part could potentially be used as is at this stage. However, generally, further sanding and polishing are preferred to attain a more consistent and high-quality professional finish, especially for visible car parts.
Free Tutorial: Downloadable Guide
Download This Carbon Fiber Tutorial
Enhance your skills in creating carbon fiber molds faster and more cost-effectively using 3D printing technology. This comprehensive tutorial provides detailed steps and insights into the process.
Download The PDF
5. Prepare the Surface for Coating: Sanding for Adhesion
To achieve a high-quality cosmetic finish free from pinholes and visible 3D print layer lines transferred from the mold, coating the carbon fiber part with a resin or clear-coat is recommended. Proper surface preparation is crucial for the coating to adhere correctly and provide a smooth, durable finish. To prepare the part for coating, the entire surface needs to be abraded using 400-grit wet and dry sandpaper. Wet sanding creates a key or mechanical tooth for the coating to bond to, ensuring optimal adhesion.
If your carbon fiber part exhibits any voids or larger pinholes, it’s essential to fill these imperfections before coating. Use resin to fill any voids. For larger voids, creating a dam using flash release tape can be helpful to contain the resin and prevent it from running out before it cures. Use either the EL2 laminating resin (used for the layup) or the XCR coating resin for these repairs. After applying the repair resin, allow it to fully cure and then sand it back flush with the surrounding surface using 400-grit sandpaper to level the repaired areas with the rest of the part.
6. Coat with XCR Coating Resin: Achieving a Gloss Finish
With the carbon fiber car part properly repaired and sanded, it is now ready for coating. The coating step is crucial for providing a smooth, glossy, and durable finish, enhancing both the appearance and protection of the part. While automotive clear-coat sprays can be used, in this project, we are using XCR coating resin. XCR epoxy coating resin is specifically formulated to provide a very durable, high-gloss finish and can be easily applied with a brush, making it suitable for DIY applications.
Apply XCR epoxy coating resin to your part, typically aiming for around 300 grams per square meter for each coat. It’s advisable to mix slightly more resin than you anticipate needing to account for wastage in mixing cups, brushes, and during application. The hardener must be added to the resin in the exact ratio of 100:35 by weight for XCR resin. Accurate measurement is crucial, especially for small batches. Using scales with a tenth of a gram accuracy is highly recommended. Mix the resin and hardener thoroughly in one cup, then transfer the mixture to a second clean cup and mix again to ensure complete and homogenous mixing, eliminating any unmixed resin or hardener.
Use a brush to apply a thin, even coat of XCR resin over the entire surface of the car part. Avoid overloading the surface with resin, as this can lead to runs or drips in the coating. After applying the coat, check the surface a few minutes later for any runs or excess resin and carefully remove them using a brush before the resin begins to set.
Depending on the initial finish achieved with the first coat of XCR resin, a second coat may be necessary if any surface irregularities or imperfections are still visible. Apply the second coat when the first coat has reached the B-stage of curing. The B-stage is characterized by the resin being tacky to the touch but not leaving any residue on a gloved finger. For XCR resin, this typically occurs around three hours after application, but the exact time can vary based on room temperature and humidity. After applying the second coat, allow the resin to fully cure for approximately 12–24 hours, depending on ambient temperature.
CAUTION: Similar to EL2 resin, mixed XCR resin can also undergo thermal runaway if left in bulk. Do not leave mixed XCR resin in a mixing cup if the depth exceeds 5mm. Excess resin should be poured into a shallow tray to increase surface area for heat dissipation, or the container should be moved to a safe outdoor location to prevent potential hazards from overheating.
7. Sand & Polish: Achieving a Mirror Finish
If you are satisfied with the gloss finish directly after the XCR coating has cured, the carbon fiber car part can be used as is. However, for a truly exceptional, showroom-quality finish, sanding and polishing the coated surface is generally preferred. Sanding and polishing will eliminate any minor imperfections in the coating and reveal a deep, mirror-like gloss.
Begin the sanding process with the finest grit sandpaper that is effective in quickly flattening the surface. Generally, either 400 or 800-grit wet and dry sandpaper is a good starting point. Wet sanding is highly recommended as it prevents the sandpaper from clogging with resin dust and provides a smoother sanding action. Progress through successively finer grits of sandpaper, working up to a minimum of 1200 grit. For flat areas and gently curved surfaces, use a sanding block to maintain an even, flat sanding plane. For more complex curved areas, sandpaper can be used without a block, conforming to the contours of the part. When transitioning to a finer grit of abrasive, thoroughly clean both the carbon fiber part and the water to remove any abrasive particles from the previous grit, preventing scratches from coarser particles.
After reaching 1200-grit sandpaper (or finer, for an even higher polish), proceed to the final polishing step using a polishing compound such as NW1. For larger car parts, using a foam polishing pad mounted on a polishing machine is the most efficient method.
Unlike many polishing compounds, NW1 does not require water and does not dry out quickly during use. This compound is self-diminishing; meaning the more you work it, the finer the abrasive particles become, resulting in an increasingly refined polish. You should be able to achieve a full mirror polish in a single polishing step with NW1. Once polishing is complete, wipe away any remaining compound residue with a clean microfiber cloth. This will reveal the mirror-like polish on your finished 3D printed carbon fiber car part.
8. Final Part: Ready to Install
With the sanding and polishing complete, your custom 3D printed carbon fiber car part is now ready to be installed on your vehicle! This process allows you to create a variety of lightweight and stylish automotive components, from interior trim pieces and dashboard accents to exterior parts like spoilers, splitters, and mirror caps. The combination of 3D printing and carbon fiber layup provides a powerful DIY approach to customizing and enhancing your car’s performance and aesthetics.
Browse 3D Printers
Discover Applications
2021 Edition: Explore Further
Professional 3D Printer Buyers Guide
Choosing the right 3D printer for your carbon fiber projects doesn’t have to be complex. This in-depth guide simplifies the selection process, covering crucial aspects like pricing, material compatibility, dimensional accuracy, and more. Find the perfect 3D printer to bring your automotive customization ideas to life.
Download Now